Showing posts with label production. Show all posts

Monday, August 8, 2011

Tutorial: How to Make a High Quality Copy of a Fan Expansion

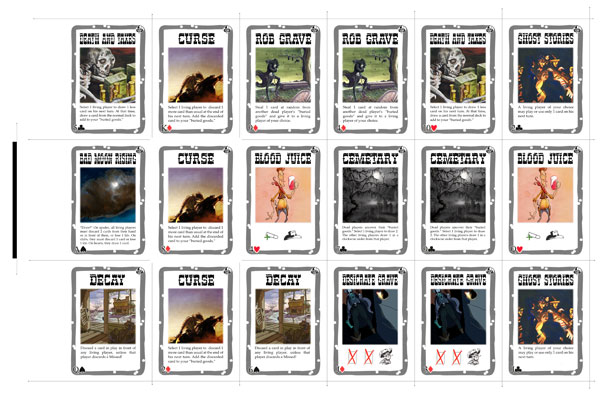
With Death Mesa no longer available for purchase online (due to publisher request), I am entering into an agreement with the publisher, which allows each person to download my Death Mesa files and produce 1 personal copy of them for free. These copies are not to be sold for profit. In helping Death Mesa fans produce for themselves the highest quality and most convenient personal copy, I have provided below a tutorial on how to use a printing service to make your personal copy. While this tutorial is designed for Death Mesa, the steps taken to make your copy apply to all custom expansions using the 18” x 12” card sheets. STEP 1: Download the files. You will want to download the 18" x 12" card sheet set for Death Mesa, all in PDF format:
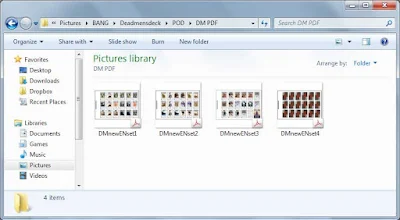
DM Printing Tutorial Pic 1
STEP 2: Uploading the files on a printing service’s site. Now that you have downloaded the 4 PDFs to the same folder, go to a printing service that you can use these files. I recommend going to Superior POD to make your personal print.
DM Printing Tutorial Pic 2
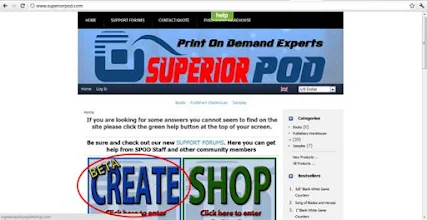
Once you get on the site, click on the large "Beta Create" rectangular image.
DM Printing Tutorial Pic 3
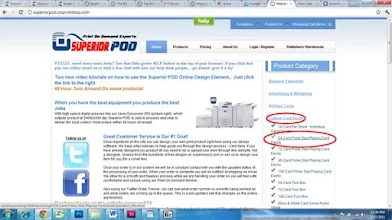
You should then navigate to a page that looks somewhat like this. There should be a right-hand column labeled “Product Categories.” Select the “Custom Card Decks” option. Several options then appear below it. Click on the “54 Card Poker Size Playing Card Decks.”
DM Printing Tutorial Pic 4
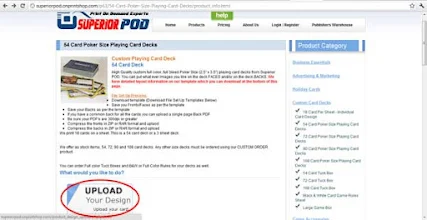
On the next page scroll down a little and then click on the “Upload Your Design” image.
DM Printing Tutorial Pic 5
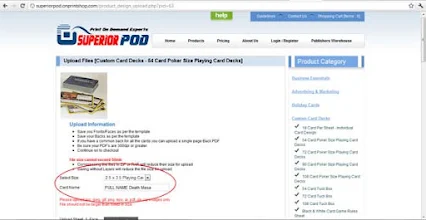
The following page has an option for card size (keep this at 2.5 x 3.5) and an input box for the Deck’s name (Card Name). I recommend inputting in this box your full name, followed by Death Mesa. Thus, my own copy would be named “Martin Pulido Death Mesa”.
DM Printing Tutorial Pic 6
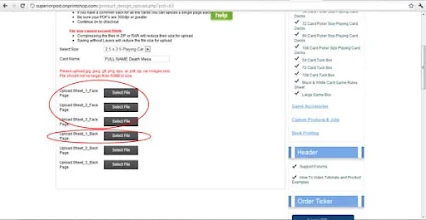
Scroll down and there should be buttons, which allow you to upload sheets for card faces and sheets for card backs. Click on the “Select File” button to the right of the “Upload Sheet_1_Face Page.”
DM Printing Tutorial Pic 7
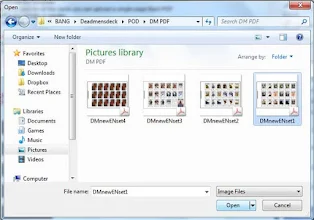
A menu should appear that allows you to select a file to be the first card face sheet. Select “DMnewENset1” or whatever file name you have for the first card face sheet (it should be pretty easy to figure out). Then click “Open.”
DM Printing Tutorial Pic 8
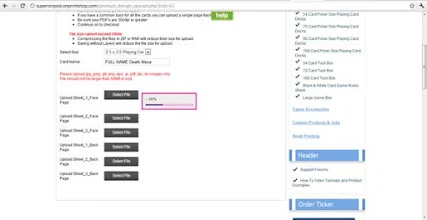
The file should start uploading, and a progress bar should appear. Wait, of course, until the file reaches 100%. You can upload the files simultaneously, so go through the same procedure to select the card face files (“DMnewENset2” and “DmnewENset3”) for Sheet_2_Face Page and Sheet_2_Face Page. The card backs are especially simple. You only need to upload a back for the Sheet_1_Back Page. So click on the Select File button for it, and select the card back file “DmnewENset4” (or equivalent). Once all of these files have been uploaded to 100%, a “Checkout” button should appear in the bottom right of the main section of the page. Click on it.
DM Printing Tutorial Pic 9
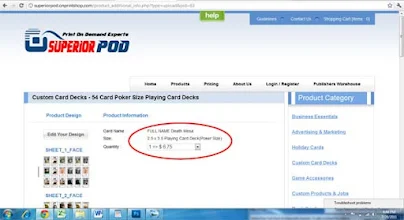
The next page should bring you a summary of your creation, listing the card name, size, and give you a drop down option for the quantity you wish to purchase. Remember, you are authorized to only make one personal copy of Death Mesa.
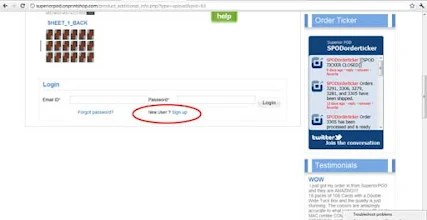
DM Printing Tutorial Pic 9
Scroll down and click on the “sign up” link for New Users. STEP 3: Entering personal information. Now, you just need to fill out your personal information, shipping, and billing information to get your own personal copy of Death Mesa made for you. If you have any questions about this process, please post them here!

Thursday, April 21, 2011

Robbers' Roost: Handcut Cards Examples

I wanted to give a preview of handcut cards I made for a prototype of the Robbers' Roost expansion using the plaincards.com templates with printing on my Canon ip90 printer, cutting using the Fiskars Premium Paper Trimmer 12", and rounding the corners with a Paper Shapers' small Corner Adorner. Eventually, I will include a tutorial of how to do this in the productions section. I have already given a tutorial on how to create your own image for a custom BANG! character.

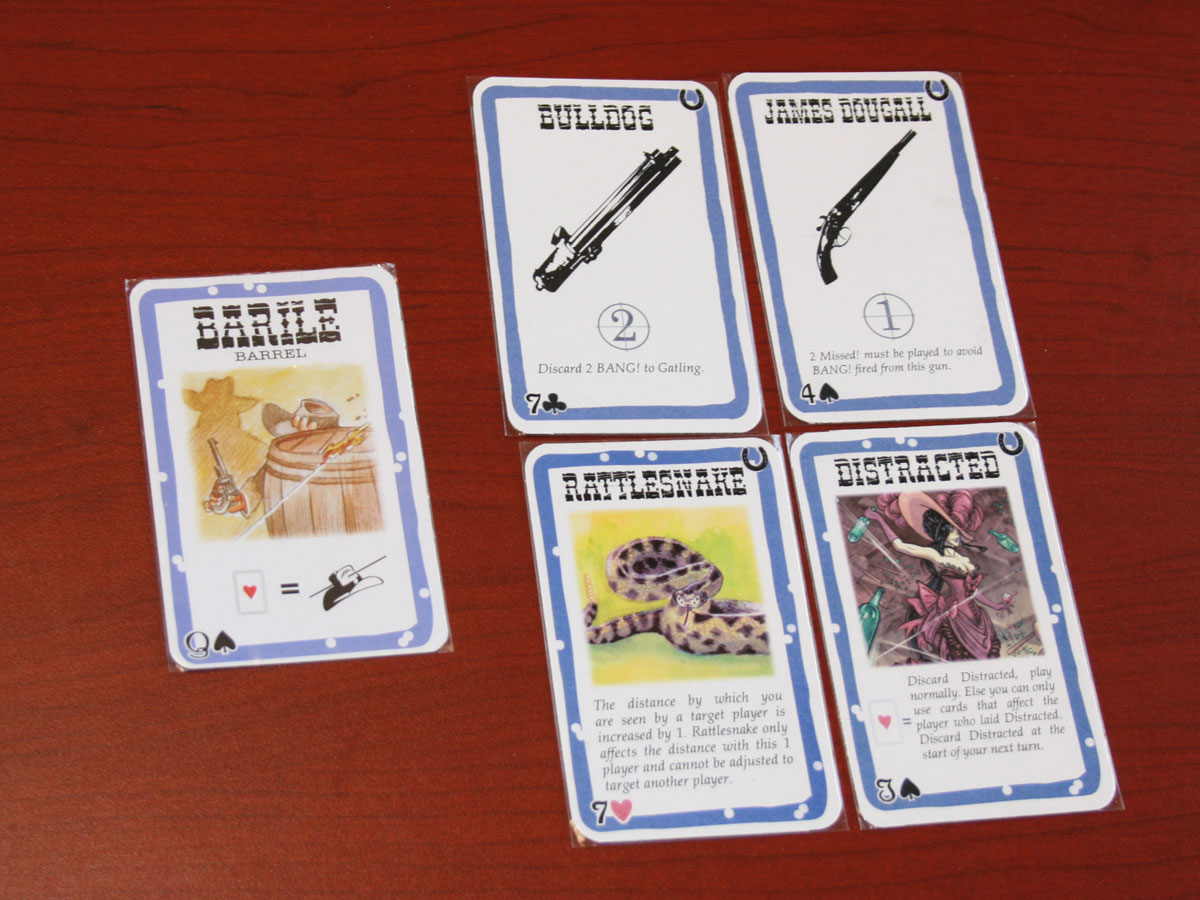
Here is an example of some prototype blue cards from the Robbers' Roost expansion with a Barrel from the original game to the left of them as a comparison.


You should notice some things right off. First, the blue border in my prototype cards is a little darker, but this isn't that important. The titles are much smaller on my cards, since I poorly assumed that the font size for the character cards was equivalent to the font size of the playing cards. I didn't recognize this problem until after I had printed the cards. Silly me. I have fixed this since, as you can tell in the card sheets I have realeased. To deal with the bigger font size on the playing cards, I also had to hack the text descriptions, which I think ended up being a good thing. The font for the card values in the left hand corner I never could identify, but I tried to find a similar scripty font. However, one playtester for Death Mesa said he had trouble reading the values in this font, so I changed to a more legible Microsoft Himalaya font. That is used in both the Death Mesa POD, and in the Robbers' Roost cardsheets now. Matching the colors for the backs ended up being more problematic:


While not terribly off, the woodgrain between the original card (the 3rd in the row) and the Robbers' Roost prototypes in clearly different. The discerning player could tell if a card on top of the deck was a Robbers' Roost card or not in good lighting. This could/could not be so bad, as that means he knows that it is one of 56 new cards in the deck, but since some of those cards are from the original game (BANG!, Missed!, Beer, etc. to balance out), he cannot infer too much. One way of dealing with the color management issue was for me to make the orange cards necessarily placed in front of other players. That way everyone would know that it is an orange card from the expansion anyway, so it undercuts that discerning knowledge.

Now for some tan and orange cards:


Nothing really new to explain about these cards beyond what I said about the blue cards. I apologize for the blurry/darker picture of the orange cards. Of note, I renamed "Old Nag" to "Wild Stallion" (tribute to Bill & Ted), and the values of these tan and orange cards I have mostly changed.

As for character cards:


Fanny Porter, the second character in the row (and now Maggie Mae in the official release), is the prototype character. Gary Looter from WWS is on her left, Uncle Will from the Bullet on her right, and Paul Regret from the original game is at the far right. I placed these characters in a row to show some of BANG!'s own variance in color throughout the expansions. Paul Regret's border is clearer the darkest, with Uncle Will lightening up some more, and Fanny Porter and Gary Looter are nearly the same hue. These borders have a lot more flux in them. Character images too: Uncle Will is far lighter than Gary or Paul, with Fanny somewhere in between. The strokes on Fanny Porter have a more magenta tint however. The font sizes are correct across the board. In terms of text, both use Palatino Linotype, but Fanny only includes an English description (also italicized as in the others). As for the backs:


The colors are closer here, but again the woodgrain is off, having more of a magenta than orangey tone to it. Getting this back right is less problematic for gameplay as the characters are all dealt at the beginning of the game. Nonetheless, it is aesthetically pleasing to get things as close as you can.

I hope this gives you a good feel for the custom cards you can make using the plaincards.com templates and your own printing/cutting tools. Mod on!

Monday, April 4, 2011

Death Mesa: Unveiling POD Prototype Results

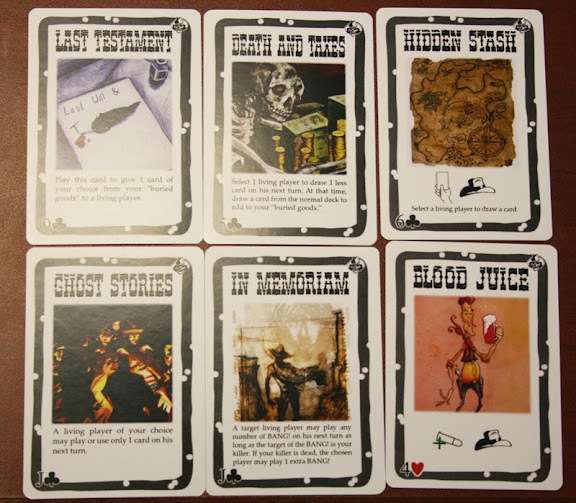
Today, I opened up my mailbox and I finally got my Death Mesa Prototype that I had ordered from a POD. Overall, I am very pleased with the outcome, and I am confident I can fix the errors that creeped into this one. As I walk through my judgments, I will show pictures to aid the narration. When I opened up the package, my custom deck was nice and tightly shrinkwrapped. The cards did not show any sign of being bent or warped.


A Shot of the Shrink-wrapped Deck.


The Shrink-wrapped Deck in my Hand.


As I opened up the deck, there were many things that I like. The card stock is very sturdy and has a good flex to it for shuffling cards. The cards printed in the areas I had planned and were cut about as good as I could hope for. The text printed cleanly (despite the photos on this page, which I took quickly with a camera borrowed from my work place), the fonts showed up well, and the cards had a slight glossy finish to them. In terms of the colors, however, I had mixed results. To specify, it was really the brightness/darkness of the cards where I had some problems. I would have done some color management work, but I don't know what printers they have, and they weren't going to do it on their end, so this was bound to happen. Fortunately, I can tweek the colors for the official release. Anyway, time for some pictures. Some cards I think turned out really well:


Others were a little dark:


And sadly, others were way too dark:


I will have to adjust some of these cards' brightness for the official release. This was the only real problem with the cards, and that is very fixible. I might have to spend a little time on the phone with the POD, but I am confident things will turn out great. I should be able to set up online also I way for you to order your own copy for around $7.20+shipping. Details on that I will post soon.

Thursday, March 17, 2011

Death Mesa: POD Prototype

Death Mesa BANG! POD Prototype

I finished up my templates to print the deck at a POD. Once it gets shipped to my home, I will provide photos of the cards, and comment on their quality. If they suck, you/I will at least know to avoid this POD in the future! And if all goes well, I should be able to set up for you to be able to order prints of Death Mesa online. That's the hope anyway. I'll keep you all posted.

Tuesday, March 8, 2011

Death Mesa: POD Production and Purchasing Soon (Hopefully)

I have been getting several requests from people who want to buy Death Mesa. However, BANG! is copyrighted and it is not legal for me to make money off it.

But there is still the problem of it being a hassle to produce the cards with the artwork. I may have found a solution to that problem.

I believe I have found a way to have the Death Mesa expansion printed by a POD, and I am hoping to even have it so that you can order it online. The idea is for you to just be able to click a link and have it added to a shopping cart. The expansion should roughly cost $5.20 + shipping for printing the cards, which is pretty reasonable. The cheapest price I saw for Wild West Show online was $7.95 + shipping to give a comparison. The price for Death Mesa will be so cheap because again I am not making any money off of it. I am simply finding a way to expedite the printing of the cards for you, serving as a sort of middle man. Since I have already provided the files for you, I have reformatted them for the POD, and will make a process by which you do not have to submit these reformatted files to the POD yourself.

I will provide proof that I am making zero profit from it; the only company making money off of this is the POD. This would be the same case as Kinko's making money off of you for printing the cards off at their local store. Or similarly, Canon making money off of you for buying ink cartridges and plaincards.com for getting your own card sheets to print off the custom cards. I don't think there is anything wrong with this. If there is, I guess I can just offer the preformatted cards, give a tutorial on how to upload them and schedule the order through the POD, and then you can do it yourself. I don't really see the difference, but maybe someone else does.

Anyway, before I allow anyone to have the cards printed through the POD I will want a set of the cards myself to insure their quality. $5.20 may not be much, but you still don't want crap, right? Once I get that done, if I am satisfied with the results, I will take pictures and then create the means by which you can order them through the POD yourself.

Saturday, March 5, 2011

New Blank BANG! Cards for Purchase


DV-Giochi has started selling blank BANG! playing and character cards for a reasonable price (€1,90 that is roughly the equivalent $2.50). The problem is that at the moment the cost of shipping is about $47.00 (€33,80)! I am sure (or I hope) this is only a temporary problem until a supplier in America starts selling them. When I find one, I will let you know.

The blank playing/character cards come in a pack of 20: 10 playing cards, and 10 character cards. They look to be identical to the blank cards that were provided in the BANG! the Bullet. Unfortunately, due to this I doubt that there will be any 3-bullet life point cards. Sure, you can just only "color in" the 3 bullets, but many like myself would like a superior aesthetic element to them. Also, the borders will have the outlined border around them, but I don't see any easy way that they could have gotten around that.

I am curious to know how well printing on top of one of these cards works with the glossy coating it will almost definitely have over it. I suppose I could try printing over 1 of my blank BANG! the Bullet cards and letting you know. I am definitely not going to buy a pack to figure that out while shipping is as high as it is. My hunch, however, is that it will only work well for drawing over it, in a very "home made" style as in this image below.

This may work for casual modders, and that is fine, but many of us will want something that has a superior look.

Anyway, I am grateful on the whole to have them, and look forward to win shipping costs drop!

Thursday, December 16, 2010

Production: Playing Card Stock

When you are making your own custom cards for BANG! it is important to consider the card stock you are printing on. You want your cards to general fit in with the original game cards and you want them to be durable, work well for shuffling, and be able to handle a good print job (the ink sticks to them and the paper doesn't jam). You can of course get your cards professionally made through a service. But most of us don't have that kind of money to throw down. As far as I can tell, the only real option is to print them yourself unless you have some buddy. Card stocks for printing that you can grab from Michael's, Office Depot/Office Max, Staples, and Hobby Lobby really don't do the trick. I visited all my local stores and was unimpressed. Even copy stores like Kinko's don't have that heavy of stocks for printing. I turned to looking online. You can probably purchase heavy stock yourself and make your own custom guides to cut them with. I went with playing cards from PlainCards.com, and bought their kit.


Their small kit comes with 18 sheets of playing cards, with 8 cards a sheet (144 total), and also a can of playing card coating, 2 plastic card boxes, and an edger. It cost $20.50+ shipping. A little pricey, but not terrible. Each of the card sheets is microperforated for where the cards are to be printed. So you can print the cards on a template to match the sheets. After the printing, the cards can be spray coated and then popped out. Edge the corners, and then you're done. Well, if only it was that simple. That would work in some games, but not BANG!. There are some complications with the PlainCards.com card sheets. For one, you can't get microperforated cards that are the same size as BANG! cards (the two available options are 2 3/8" x 3 1/2" or 2 1/2" x 3 1/2"). So this requires card trimming and corner rounding, as I have discussed in previous posts. It also makes you have to be real careful with resizing the card template you make for the cards, so that the graphics are centered after the trimming. Second, you have to use an inkjet printer to print on these sheets. I tried doing a laser printer at Kinko's, and while half came through, the other half jammed, smeared, or what-have-you-that-could-be-bad. Wasting card stock is a bad idea when it is pricey too. I was able to calibrate a home printer to do a great job, but remember that the ink adds a new cost. Kinko's would have been cheaper. Overall, the PlainCards.com card stock is really nice, and the coating is good to get. It just takes a lot of extra work to get the cards to be the right size and shape. Unfortunately, I am not aware of any easier options.


I read on some forum that EAI Education has some decent playing cards. Their cards are better sized at 2 1/4" x 3 1/2", but they will still require some trimming if they are to match the BANG! cards and get into card sleeves. They are also a cheaper option at $1.65 for 50 blank playing cards. However, there are some downsides. The EAI Education site requires you to spend $15.00 for an order, so you may have to purchase 500 cards from them to get a good rate. Of course, you may find some other items on there that you would like to purchase to offset this. Second, the cards do not come in sheets, but are precut. While this saves you the headache of punching out, it makes printing more difficult. One, your inkjet printer probably does not have two manual guides to keep the playing cards from slipping around. You may be able to tape it to something to keep it in place, but this clearly removes much of the benefit of having them precut. Second, from the image on their website, it isn't clear that the cards are meant to be printed on. Markers are shown all over them. This makes me wonder how well ink will stick to the cards, and what kind of finish they will have. I haven't yet bought these cards, but I may try them out. I just have my concerns. If anyone has tried these or other cards out for printing let me know. It might be best to just buy really good, heavy card stock on line and make your own from scratch. It will take time to make the goods and cut them out, but when you have to trim the other cards down anyway, is it really that big a deal? You will probably save money in the long run.

Wednesday, December 15, 2010

Production: Cutting Cards

Regardless of which cards/card stock you print your custom cards, it has always been the case for me that you will need to trim your cards some (which also required printing the cards off-center, so that when you cut the sides they become centered). Otherwise the cards will not be the same size as your other BANG! cards, nor will they fit in the same card sleeves. Using scissors is a bad idea, giving you some poor edges that will be easily identified as not belonging to the original game. I recommend using a paper cutter instead. It will have a ruler built in that will help you cut the cards at the same, consistent spot.


For this job, I recommend the Fiskars Premium Paper Trimmer 12". If you click on that link, prices range from $29-$41 for total price (shipping include). I think scrapbook.com's prices are almost always better. Another good bet is searching your mail for a Michael's, Robert's, or Hobby Lobby coupon. They usually have a coupon for 40-50% off any item of your choosing that is not on sale.

An even easier option might be to just on their website and find their local ad coupon and print it off (Links to this for Michaels, Hobby Lobby, Roberts). Grab/print this and go into your local store and buy the paper trimmer to save yourself some cash. Then go about cutting your cards to the right size (I'll get into more detail on this in the future). Then round the corners on the sides that have been trimmed (and other corners that need it), and then use an edger to smooth the edges.

Sunday, December 12, 2010

Storage: Card Sleeves

When you're done producing your cards, you will likely find out that your cards have a different feel than the others (if not also a visual difference in terms of some color outputs and gloss). You can help balance this out by sticking all of your cards in card sleeves. This also has the benefit of protecting your custom prints, keeping your cards clean, and helping them last longer.


When it comes to card sleeves, I recommend Mayday Gamers' Standard 2 1/4" X 3 1/2" sleeves. They fit BANG cards like a charm, and should work for your custom cards if you trimmed and rounded them correctly. The sleeves come in a 100 pack, and cost $2.25 on the Mayday site. As always, check Google shopping for the sleeves. When I checked both Fair Play Games and CCG Armory were selling them for $1.50 per 100 pack. I got mine for around that price at the local comic book store, so you might want to check there yourself and see if you can avoid shipping costs for something as small as this.

Shuffling with card sleeves is a little irritating, but you'll get the hang of it. Check out this video, which makes it seem a little worse than it really is (at least for me):


If anyone else knows of any better card sleeve options, feel free to post a comment here.

Production: Rounding Corners on Playing Cards

Since BANG! cards are a strange size (something like 3 13/32" X 2 7/32"; I can't remember off the top of my head, I will correct this later if I am wrong), you will almost always have to trim the custom card stock that you print on if they are precut, microperforated, or what-have-you. However, after you trim the sides of the cards the corners will no longer be rounded. You will have to make up for this yourself. I would strongly recommend against doing it by hand; you will not do a convincing job. I dropped by local stores like Michael's, Robert's Crafts, Hobbytown USA, and Hobby Lobby to find a corner rounder that was small enough for playing cards, but it was to no avail. The smallest thing you'll find is 1/4". I would suggest ordering online a small 1/8" corner rounder that matched the original cards decently well. I ordered the Paper Shapers small corner rounder and was very pleased with it. Here is a picture of it:


You can easily order this online, just check Google shopping for the corner rounder. The cheapest option right now prices total price (shipping include) at $6. That's very affordable. I am sure there are some other options, but this is the one I recommend.