Showing posts with label defensive characters. Show all posts

Tuesday, February 14, 2012

Character Guide: Teren Kill

Teren Kill BANG! card game character

Character Name
: Teren Kill.

Inspired by: Terrence Hill, an Italian action who starred in many spaghetti westerns.

Life Points: 3.

Ability Type: Defensive.

Ability: "Each time he would be eliminated 'draw!': if it is not Spades, Teren stays at 1 life point, and draws 1 card." It should be clarified that this moment is upon his "would be elimination," so a player can choose to play a last chance Beer and not undergo the "draw!" (see WWS FAQ Q18). However, the instruction cards explain that if a person voluntary foregoes playing the last chance Beer and "draws!" for Teren Kill's ability instead, he cannot afterwards play the last chance Beer if it is unsuccessful.

Activation: When he would otherwise be eliminated.

Cards less effective when played against by Teren Kill: Dynamite, and all damaging cards to some extent.

Cards more effective when played by Teren Kill Dynamite (he is less likely to be eliminated by its random mechanism than his peers).

Good role for Teren Kill: Renegade.

Characters that counter Teren Kill well: John Pain (for everyone of Teren's "draws!," he has a good chance of picking up a card too), Lee Van Kliff/Willy the Kid/Doc Holyday (they can easily make 2+ attacks during their turns, and so have a good chance of eliminating Teren Kill when he is down to his last life point), and most importantly Kit Carlson (he has a fair chance of stacking a spade against Teren Kill when he is at his last life point, and then attack him; if Teren has to "draw!" he is guaranteed to die).

Characters that Teren Kill counters well: Greg Digger/Herb Hunter/Vulture Sam (these characters' abilities activate upon player elimination; since Teren Kill will tend to not be eliminated easily, it makes it more difficult upon them), to some extent Pat Brennan/Belle Star (They can ignore (on Star's turn)/remove cards in play in front of Teren Kill, but it won't affect his native defensive ability, not to mention the card he draws into his hand if his "draw!" succeeds), and Slab the Killer (Slab's attack still only adds up to 1 life point lost, and so while it might blunt Teren Kill's defensive cards, it doesn't affect his ability).

2-player value: Excellent. His life retention ability will be very helpful when his opponent can no longer utilize Beer to regain life points.

General Strategy as Teren Kill: Teren Kill's ability gives him a 75% chance of remaining alive and drawing a card when he would be eliminated. The "drawing!" for this outcome does interact with event cards (Curse causing his immediate demise) and characters abilities (John Pain's, for instance). Of course, when Teren Kill is attacked in succession during another player's turn, his chances of survival are above 75% on the whole. The "draws!" probabilities remain relatively the same (the "drawing!" mechanism never gives a perfect a priori probability due to it only applying to the values of the cards remaining in the deck, so it is different from rolling a 4-sided die; cards in play are not reshuffled back into the deck until discarded, also changing probabilities), but the card drawn by Teren Kill upon a successful "draw!" increases his chances of survival. Thus, he could gain a card that can ward off BANG! or Indians!, or gain a Beer to play in a last chance sense. If a card takes off 2+ life points, Teren Kill does not have to "draw!" for each life point, just once. See Q12 of the Wild West Show FAQ:
Q12. If Teren Kill is eliminated by Dynamite, how many times does he have to "draw!" to stay alive? A. Just one time; if it is a card of Spades he is out, otherwise he stays at 1 life point (and draws a card from the deck).
While this defensive ability is quite powerful, it does have an irritating side to it: it only activates as a "last resort" before elimination. Any moment before then, his ability has almost no application. And he doesn't want to intentionally lose life points to use the ability since this move affects his card limit. He, of course, will try to build a hand and get cards in front of him that don't require him to use his ability. This, in essence, makes his ability pretty boring until he gets to his last breath, and it could still be boring if on his first "draw!" he gets a spade. If he survives, he has a fair chance of recovering another life point with likely having 3-4 cards in his hand at the beginning of his next turn. This make the card limit issue slightly less problematic. There is one exception to the Teren Kill's rather bland gameplay: Dynamite. Teren Kill should try to play it whenever possible. Since the chance of it exploding on him and eliminating him is quite low in proportion to the other players, and the damage it inflicts on others is so great, Dynamite is Teren Kill's best friend. Of course, this works far less effectively if Teren has to worry about blowing up his team mates, so he should consider the mix of player roles.

Playing against Teren Kill: Teren Kill is not a powerful character in an offensive sense. With a defensive ability that only activates upon his nigh elimination, and a 3 card limit, it is relatively easy to knock down his life points/card limit. But that shouldn't make you suppose that Teren Kill is weak. His stubborn persistence to live makes the battle with him one of attrition. His weaker offensive edge can still take you in the end if you do not put him down. However, since he is weaker offensively, you might consider ignoring him until you can eliminate one of his easier-to-off allies. If Teren Kill is Sheriff and you are an Outlaw, this does lead to a bit of a conundrum: do I still try to make a strong offensive burst at Teren Kill with my fellow outlaws, or do we try to knock out the Deputies/Renegades first? This is a toss up, but the tide of the battle is seriously against you in 7-8 player games (with 3-4 other non-Outlaws). The burst may be the only viable option, even though it would be extremely lucky for it to succeed. In a 6 player game, things are different. However, if Teren Kill is not the Sheriff (say, an Outlaw), eliminating his allies first makes far more sense. Whether or not you ignore Teren Kill momentarily, watch out for when Dynamite is in play. This card has a lot higher chance of doing damage to you/your allies than it does to Teren Kill. In most cases, you will want to steal, discard, or otherwise remove it from play, so that your team's position isn't compromised. Once you focus on Teren Kill, apply the same general offensive strategy until he gets to his last life point. Teren Kill will try to compensate during early-mid game by building up some defensive cards in his hand and in play (Mustang, Barrel, etc.). Use steal/discard abilities and cards to remove the defensive stronghold and pummel him down to his last life point to decrease his card limit. To finally eliminate him, chances are that a strategically orchestrated attack is necessary. This means either that you and your teammates attack him in succession before he has a turn, or that you can hit Teren Kill with an offensive combo, so that he has to "draw!" to keep his life multiple times. Of course, desperate times call for desperate measures, so this ideal orchestration may not be a feasible reality. Just keep shooting, then! Odds should require you to only make him "draw!" 4 times, but you can never tell. The battle with Teren Kill could be epic, or laughable (he "draws!" a spade the first time).

Friday, May 6, 2011

Character Guide: Elena Fuente


Character Name: Elena Fuente. 

Inspired by: No clear connection to any western character. The last name does echo the Fuentes brothers in The Return of Ringo, some outlaws who took over the town of Mimbres and took over the town's gold. "Fuente" in Spanish means "fountain," associated with water, the ability to slip away. 

Life Points: 3. 

Ability Type: Defensive. 

Ability: "She can use any card as a Missed!" This may seem to indicate that she can also use cards from in play in front of her as Missed!, but the Dodge City rules clarify that "she can use any card in her hand as a Missed!" So she cannot use cards in play in front of her as Missed!. 

Activation: Whenever she has the opportunity to use a Missed!. 

Cards enhanced by Elena Fuente's ability: All cards except Missed! and Dodge. 

Cards more powerful when played against Elena Fuente: Cat Balou, Panic!, Rag Time, Conestoga, Can Can, Brawl, Dynamite, and Duel. 

Cards less effective when played against Elena Fuente: Attack cards (besides Indians! and Duel) and Volcanic. 

Ideal roles: Sheriff, Renegade. 

Characters that counter Elena Fuente well: Jesse Jones (can remove cards that can be played as Missed! from her hand), Slab the Killer (his BANG! take 2 Missed! to avoid; this is a lot of cards out of Elena's hand when she is a 3 lifepoint character).

Characters that Elena Fuente counters well: Belle Star (her defensive cards come from her hand, so that Star's ability is not very effective against her), Willy the Kid (as long as she has cards in her hand she can avoid Willy's BANG! spray), and Doc Holyday (she can avoid his 2 BANG! a turn). 

2-player value: Excellent. Since there are no longer effective Beers, abilities allowing you to avoid shots are especially useful. Remember that Elena can still used the ineffective Beers as Missed!

General Strategy as Elena Fuente: While Elena Fuente is not bound to get eliminated in the first round, she shouldn't take many risks that get people's attention. Elena Fuente's goal should be to get cards in play in front of her, and depending on her role, aim for cards of more of an offensive or defensive type. So that Elena Fuente doesn't have to expend so many cards from her hand when shot, she should try to get an Iron Plate, Sombrero, Ten Gallon Hat, or Barrel out there, and more importantly distance modifiers like Mustang and Hideout. A long distance gun is also a good idea, for when Elena Fuente does starting pulling the trigger, hopefully she will select a target that is in her range, but she is not in his. 

If Elena Fuente's role allows her to be conservative (Sheriff, Renegade), then she should try never to have less cards in her hand by the end of her turn than her card limit allows. That way Elena Fuente is ready for any onslaught that might come from some character's ability, or from a suddenly appearing Volcanic. Of the cards that Elena Fuente keeps in her hand, she should try to keep as many BANG! as possible. That way she is not only protected from normal enemy fire, but also the Indians! and Duels that other players are bound to play against her (as her ability only uses cards as Missed!, not BANG!). Elena Fuente will thus be prepared for these alternate attack strategies, and also be ready to shift to the offensive if a good opportunity arises. With duels, on the whole, Elena Fuente may wish to just take the hit instead of deplete cards that can be used as Missed! for future attacks. 

While having a Beer in Elena Fuente's hand isn't a bad idea to recover health when she takes a hit, she should not try to save the Beer once she has lost a life point. Her opponents are bound to try to steal or discard cards from her hand, and it would be a shame for her to lose a Beer when Elena Fuente could have recovered the life point. Thus, last second beers are not recommended for Elena Fuente. 

Dynamite is a terrifying risk for 3 life point Elena Fuente. She might want to steal or discard it to remove it from play whenever possible. 

Playing against Elena Fuente: Elena Fuente is a very difficult opponent to kill. Fortunately, there are some actions you can take that will be to your advantage. First, while you will be unable to kill Elena Fuente in the first round, it isn't a bad idea to try to knock Elena Fuente out quickly before she has many cards in play in front of her that make it difficult for others to attack her (defensive green cards or distance modifiers). If it is a slow game or if people really want to wait for players to reveal their roles, then this will not work very well against Elena Fuente. In that case, you will want to monitor very carefully Elena Fuente's card limit. If she is playing smartly, Elena Fuente will rarely over extend herself during her turn so that she almost always has 3 cards (unless she is Sheriff) in her hand by the end of her turn. However, if there is an instance where she goes below 3, take advantage of it. Attack her at these moments. If you are on a team, then hopefully your team mates will also pay attention to when Elena Fuente's card limit goes down. They should attack then as well, so that you have good coordinated attacks that will not only make Elena Fuente lose life points, but also make her take some time to recover her cards. 

You can best take advantage of low card limit moments for Elena Fuente in 2 ways. First, you can use other cards (and abilities) that will further diminish Elena Fuente's cards, such as using cards that can discard or steal cards from her hand (Cat Balou, Panic, Rag Time, Conestoga, Can Can, and Brawl). By doing so first, you will be much more likely of hitting her with your shots, and you may even gain more ammo to shoot her with (or a saved up Beer). Second, you can use cards that take off life points, but cannot be avoided by using Missed! Thus, Indians! are powerful against Elena Fuente, and Duels are also devastating for her. Elena Fuente needs BANG! to avoid these cards, and although she may have 1, it is unlikely that she can win a Duel against a 4 life point character playing a Duel on his turn, who is bound to have many more cards in his hand. 

If this isn't working for you, you can always throw out a Dynamite. While it is always risky, Elena Fuente cannot use her Missed! to avoid the Dynamite blast. As a 3 life point character, the Dynamite also has a good chance of eliminating Elena Fuente too.

Thursday, April 7, 2011

Character Guide: Apache Kid


Apache Kid BANG! card game character

Character Name: Apache Kid.

Inspired by: The Apache Kid (Has-kay-bay-nay-ntayl), a White Mountain Apache scout and outlaw, who lived in Arizona and New Mexico, and later in the Mexican states of Sonora and Chihuahua in the late 19th century.

Life Points: 3.

Ability Type: Defensive.

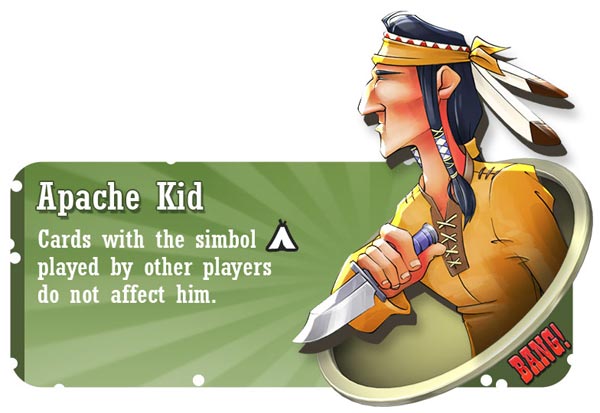
Ability: "Cards of Diamonds played by other players do not affect him." The wording on this ability is somewhat poor, especially the nature of "played," so consulting the Dodge City rule book and FAQ helps us somewhat. The rulebook states, "he is unaffected by cards from the suit of Diamonds played by the other players. During a Duel, his ability does not work." This last statement about Duels makes sense, because BANG! in duels are not played, but discarded. Thus, diamond BANG!s can be discarded in a duel with Apache Kid and be effective. But what about diamond Missed! cards that his opponents play to avoid his BANG? Furthermore, what about cards that are played in front of other players, such as the green and blue cards? A casual reading of Apache Kid's ability could conclude that scopes of other players do not work on Apache Kid. Fortunately, the Dodge City FAQ gives us a detailed explanation of the application of Apache Kid's ability:
Q10. Does the ability of Apache Kid prevent other players to play Missed! cards of Diamond against his BANGs?
A. No. Apache Kid’s ability applies to cards played by other players only, thus during other players’ turns. Therefore, he is unaffected by about half of the BANG! Cards, by all Indians!, by Conestoga and by some Cat Balou and Panic! played against him. Other cards (General Store, Hideout, weapons, etc.) always works normally.

From this we can gather that only cards played against him that affect him (Missed! cards do not affect Apache Kid, they affect the player who played the Missed!), which expire immediately on their use (green and tan offensive cards), activate Apache Kid's ability. Blue cards do not.

Finally, to be a stickler, cards of diamonds can be played against Apache Kid, they just have no effect (like Beer in 2-player or when a player plays Beer when he has full health). Thus, a hard-nosed interpretation of the rules could make a player not be able to take back a diamond he played on Apache Kid. The move was legal; it just had no effect. This interpretation is also to a player's advantage in some rare scenarios. Think of playing with the Wild West Show expansion and Gary Looter is in play. You are 1 card over your card limit, and Gary Looter will pick up your card if you discard. Apache Kid is the only player within reachable distance, and so you choose to play a diamond BANG! against Apache Kid just so Gary looter will not get a card. Let me present another less obscure example: say Suzy Lafayette is trying to chain her ability, and the last card she has in her hand is a diamond. If Apache Kid is the only player that she can reach or target with it (such as when only 2 players are left standing), she can still play the card against him and draw another card.

Activation: On other players' turns, when another player plays a card against Apache Kid (that affects Apache Kid), which immediately expires upon use.

Cards less effective when played against Apache Kid: BANG! (13/28 are diamonds), Cat Balou (3/5 are diamonds), Indians! (3/3 are diamonds), Panic! (1/5 are diamonds), Conestoga (1/1 is a diamond), and to some extent a Duel (1/3 are diamonds).

Cards more effective when played against Apache Kid : Duel (2/3 are not diamonds, and using one against Apache Kid allows you to expend the diamond BANG! against him), Dynamite.

Ideal role: Sheriff.

2-player value: Great. Many offensive cards will not work against you, and it is very difficult to remove cards from in play in front of you (36% do not work against Apache Kid).

Characters that counter Apache Kid well: Doc Holyday (he can use his ability to shoot a non-diamond BANG! at Apache Kid, as long as one of the discarded cards is not a diamond), Calamity Janet (12/13 Missed! that she may use as BANG! are not diamonds).

NOTE: To some extent characters that draw more cards, or have a greater selection of cards to choose from, will have a much greater chance of picking up cards that can be used against Apache Kid (Black Jack, Kit Carlson, Pixie Pete, in some scenarios Bill Noface, José Delgado, and Vera Custer).

Characters that Apache Kid counters well:Willy the Kid, Slab the Killer.

General Strategy as Apache Kid: Since Apache Kid has a great resistance to cards being stolen or discarded from him (36% do not affect him), he should work hard in the early game to not make any enemies while trying to build up a good card base. It shouldn’t be too difficult to avoid “unintentional hits” from cards played that hit most players, as only Gatling and Howitzer can affect him. These are often played during early game when players don’t want to expose their roles. Allies can worry less when playing Indians!, as they will not hurt Apache Kid. Apache Kid should try to get distance modifiers, a gun, and offensive/defensive green cards in play in front of him.

I would also recommend for Apache Kid to save up a card that allows him to steal or discard a card from another player(s). All green offensive cards are non-diamonds, and can thus hurt Apache Kid. It will be a good idea to remove this card from an opponent before he can use it on you. While Volcanics are very dangerous for 3 life point characters, they are less problematic for Apache Kid, as nearly half of the BANG! cannot affect him. So while dangerous, their being in play is less problematic than might be supposed. Apache Kid should be more nervous about deadly non-diamond attack combos that can be played against him. That is why he should monitor the green offensive cards, and try to cards from the Missed! family in his hand or in play in front of him. He will always have a round to anticipate them, and hopefully a turn to act against them (as long as he is not thrown in Jail).

After Apache Kid has built up a decent card base in the early game, then he can shift to targeting a player he needs/may need to eliminate. I wouldn’t have Apache Kid make too many enemies, but he should expect an ally to back up the player he attacks. It would be helpful if he attacked an enemy that one of his own allies could also reach, or one where it will be very difficult for an ally of an opponent to back him up.

Apache Kid should moderate his BANG! use. If Apache Kid has many BANG! in his hand and he wishes to play one, he should choose to play a non-Diamond BANG! While this adds a non-BANG! to the discard pile, which will eventually shuffle into the draw deck, it protects Apache Kid from having a BANG! stolen from his hand that can then be fired against him. When General Stores are played, he should try to grab a non-diamond BANG! and other non-diamond card that can be played against before his opponents can get it.

If someone plays a non-diamond Duel against Apache Kid, in most cases it is better for him to take the hit, rather than expend his BANG! I say in most cases, because there are times when opponents have fewer cards in their hand and Apache Kid may have 1-2 BANG! Since there is no defensive penalty for Apache Kid expending all of his BANG! (as he is immune to Indians!), getting rid of all of them to win a duel is not necessarily a bad idea. It is something for Apache Kid to consider when duels are initiated, and something for him to consider if he has a Duel and many BANG! himself (he may wish to initiate a duel).

General Strategy against Apache Kid: Apache Kid is a very annoying opponent to have, as many of the cards you want to play against him will have no effect on him. However, he is a 3 life point character, which makes him very vulnerable to Dynamite, and to attack combos. Unfortunately, the latter is a little more difficult to pull off. Apache Kid is immune to Indians!, and 36% of the cards that you could use to discard or steal defensive cards from him do not affect him either. This means that you will have to have a very specific card set to lower his health. The General Store can help you here some. It should give you some non-diamond cards to choose from that can help you against Apache Kid. Especially useful in the store is the Duel. If you pick up a bunch of BANG! that he is immune to, try to get a Duel as the BANG! discarded in the Duel can be diamonds. At least that way you can get rid of generally useless BANG! and take a life point off of Apache Kid. The green offensive cards are another great bunch to add to your combo, as all of them are non-diamonds. Unfortunately, you do have to wait a round before you can use them against Apache Kid.

After getting a least 2 cards with which you can attack Apache Kid (and hopefully some card that will remove a defensive card from his hand or in play in front of him), you should be able to knock off a life point from Apache Kid. This will hopefully get another ally to attack him during this round, and force him to discard cards during his discard phase for being over his card limit. If possible, you will want to eliminate Apache Kid before a 2-player duel, as he is a very tough 1-on-1 opponent. Finally, remember as I presented above that diamond cards can be played against Apache Kid, they just do not affect him. This can be useful in some scenarios, especially with Suzy Lafayette.

Return to the BANG! Character Guides Portal

Friday, March 25, 2011

Character Guide: Molly Stark


Molly Stark BANG! card game character

Character Name: Molly Stark.

Inspired by: Molly Stark Wood, the Wyoming school teacher in the western, The Virginian.

Life Points: 4.

Ability Type: Defensive.

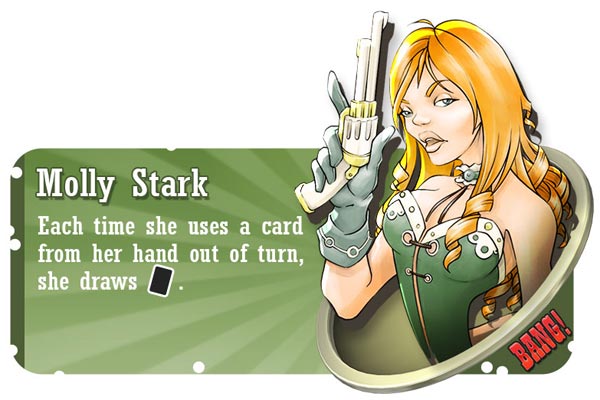
Ability: "Each time she uses a card from her hand out of turn, she draws a card." The Dodge City rulebook adds that "using" equates to playing or voluntarily discarding (cards stolen or discarded from her are not considered voluntarily discarded). Thus, she draws cards for the BANG! voluntarily discarded during duels. However, the rulebook specifies that "If she discards a BANG! during a Duel, she does not draw her replacement cards until the end of the Duel, when she would draw one card for each BANG! she used during the Duel." Thus, her ability activates after resolving the action. This would apply to playing Missed! or Dodge to a BANG! fired at Molly Stark from Slab the Killer. She cannot play a Missed!, draw a card, and if it is a Missed! or Dodge, play it and then avoid Slab the Killer's attack. She must have two Missed! initially to avoid the attack, and then draws the cards afterwards.

Activation: When she voluntarily plays or discards a card during another player's turn.

Cards enhanced by Molly Stark's ability: Missed!, Dodge, BANG!, Beer, General Store

Cards less powerful when played against Molly Stark: Duel, Indians!, Volcanic, Jail

Cards more powerful when played against Molly Stark: Panic, Cat Balou, Brawl, Rag Time, and Can Can when selecting from her hand.

Ideal roles: Sheriff, Renegade (somewhat)

Characters that counter Molly Stark well: Jesse Jones, El Gringo

Characters that Molly Stark counters well: Belle Star, Pat Brennan.

2-player value: Good; drawing cards from Missed! cards and being able to draw cards from Duels is very valuable at this point in the game. Beer does lose its value here. While Molly could play a Beer as a last second Beer with it having no effect, it will do her no good because she can only draw a card if she has a life point to draw it.

General Strategy as Molly Stark: Molly Stark is a very defensive character, and so it can be very difficult to play her if you are an Outlaw or a Deputy. Molly Stark is nice to have at the beginning of the game when Indians! or Gatling are played and there was not time to build a hand. If she has a BANG!/Missed!/Dodge in her hand, Molly Stark can play one of these to not have her cards depleted before she gets a turn. Once she gets a turn, it is time to start building up a good hand. While it is true for all characters, Molly Stark should especially try to have a BANG!/Missed! combo in her hand, ready to play out of her turn so that she can draw more cards. This combo is even better if she has a Dodge instead of a Missed! because then she can draw 2 cards from playing it. General Stores are great ways of grabbing a needed BANG! and especially needed Missed!. Pay attention when other players use this card.

Duels do not end up being very useful cards for Molly Stark because it is almost always more beneficial for her to have the BANG! in her hand instead of depleting them. Of course, there are times when she cannot reach an opponent, Molly Stark has many BANG! in her hand, and her opponent has a big chance of taking a hit from the Duel. That is important to keep in mind, but it is a rare occasion.

Besides this, Molly Stark should try to get good blue and green cards in play in front of her to prepare for future battles. While distance control is important, one of the strange things about Molly Stark's ability is that its usefulness is increased when she has 1 opponent that can reach her. While she will still be able to play BANG!/Missed!/Dodge and draw cards for when global effect cards like Howitzer, Gatling, are played (or Duel), it is nice to be able to draw cards from ranged attack cards too. That is why being in range of 1 opponent is not necessarily a bad thing for Molly Stark, taking into consideration the cards that are in play on the table. If Molly Stark is able to get some good defensive green cards in front of her, then she can risk getting more offensive. Likely, though, as Molly Stark picks up cards from out of her turn and then draws on her draw phase, she will find that she has some excess cards. Molly Stark should use these offensive cards instead of discarding them!

As your life gets low, having a last second Beer is an especially great thing to have. You regain your last life point and you also get to draw a card. A pretty good bargain for that point in the game. If you can survive until 2-player, you have a decent shot at winning the game, as your responsive card-drawing will especially benefit you with 1 opponent here.

Playing against Molly Stark: The main thing to remember when playing against Molly Stark is to not Duel her unless you know she has no BANG! in her hand (she takes a hit from an Indians! for instance), she has 1 life point, or you absolutely need to take the risk. Molly Stark will be able to draw a card for each BANG! she discards at the end of the Duel. This will not deplete her cards as you might have hoped, and Molly Stark may even get the cards she needs to further her aims. While you will not need to be as cautious with Indians!, you should keep in mind that you are likely giving Molly Stark a card to draw in exchange for a discarded BANG!. Another card to be careful when playing is General Store, especially when there are many players in the game and Molly Stark is not at the end of the pickings. Chances are in these scenarios that Molly Stark will get to pick a card that she can play out of her turn.

While there are less Missed! and Dodge in the deck than BANG!, they apply to a wider variety of cards, and can help her greatly against attack cards. Even the edge of the Volcanic is somewhat blunted against Molly Stark. When she is attacked by a shot from a Volcanic, if she plays a Missed!/Dodge, then she immediately gets to draw 1/2 cards. Each shot from the Volcanic is seen as a self-contained event, so she does not have to wait until the end of the shots to draw her cards. This gives her the opportunity to pick up more Missed!/Dodge, Beer, etc. that can help her avoid shots from Volcanic during this turn and in the future.

So when playing a BANG!, attack card, Duel, or Indians! when Molly Stark is your target, it can be a good idea to steal or discard cards from her hand beforehand in hopes of grabbing a card that she can use to defend herself and then draw a card. If all else fails, a Dynamite can be a nice play against Molly Stark. Her stored up Missed!/Dodge will do her little good in this scenario, and it is highly unlikely that Molly Stark has enough Beer to survive the blast.

Return to the BANG! Character Guides Portal

Thursday, March 10, 2011

Character Guide: Tequila Joe


Tequila Joe

Character Name: Tequila Joe

Inspired by: Tequila Joe, played by Anthony Ghidra, in the film Tequila Joe

Life Points: 4

Ability Type: Defensive

Ability: "Each time he plays a Beer, he regains 2 life points instead of 1."

Activation: Whenever he plays a Beer card when there are more than 2 players left in the game

Cards enhanced by Tequila Joe's ability: Beer

Cards more effective when played against Tequila Joe: Panic, Cat Balou, Can Can, Conestoga, Rag Time, and Brawl (when played against his hand)

Ideal Role for Tequila Joe: Sheriff

Good Role for Tequila Joe: Renegade (since Tequila Joe as a Renegade always has to go down to 2-player to win, and thus loses his ability in 2-player, the role is less optimal than sheriff)

Characters who counter Tequila Joe well: El Gringo, Jesse Jones

2-player value: Terrible. Tequila Joe has no ability at this point in the game.

General Strategy as Tequila Joe: Tequila Joe's defensive ability is very easy to understand: it's all about gaining and effectively using the Beer cards. However, since Tequila Joe's ability depends on having such cards in his hand, and there are not many of them, he is a much slower defensive character. Tequila Joe is also more liable to suffer from cards and abilities that steal or discard cards from his hand. As a result, Tequila Joe must play very carefully. This involves first, of course, trying to procure Beer from either drawing it or grabbing it during a General Store. A friendly neighboring ally might help with this, like Kit Carlson, who might stack up a Beer for your next drawing phase. Then the Beer needs to be kept in Tequila Joe's hand for a useful time (i. e., to replenish lost health, be used for a last second beer, etc.). He should generally try to only play cards from his hand when either they are very useful defensive cards (blue cards like Barrel for instance) or he is over his card limit. Why? If Tequila Joe has many green cards and lays them down all at once (or if he simply plays a lot of cards that deplete his hand) it could make it very easy for an opponent to steal or discard a Beer from Tequila Joe's hand. Also, Tequila Joe should be careful when playing against the likes of El Gringo: if he hits him (and El Gringo may choose to take the hit when playing against Tequila Joe), he may lose a Beer out of his hand.

Besides this, in 5+ player it is especially important for Tequila Joe to try to keep his Deputies alive if he is a Sheriff. If they are eliminated, then Tequila Joe must eventually face off an opponent in 2-player where he is significantly weaker, as his ability will no longer work. The Renegade Tequila Joe will always have to deal with this. Chances are Tequila Joe's opponent will have the upper hand against him in the face off. If the Deputy(ies) are eliminated as a Sheriff, or if Tequila Joe is the Renegade, then Tequila Joe should try to play it extra safe when there are only 3 players left. Tequila Joe should use this time to try to play more green cards in front of him. That way Tequila Joe will have some defensives and ammunition when it reduces down to 2 player (if he survives!). The Outlaw Tequila Joe will not have the luxury of playing this way or worrying about this.

Playing against Tequila Joe: Tequila Joe's defensive ability is very stong, but it is also difficult for him to activate. There are not many Beer in the deck, and that is the only card affected by his ability (Whiskey, Tequila, Saloon, Canteen are not made more powerful by it). Also, the Beer is only useful when it is in his hand. Since you can target those cards in Tequila Joe's hand directly with Cat Balou, Panic, Conestoga, Can Can, Brawl, and Rag Time, it is not as hard to get those cards out of his hand as it might appear. When trying to remove a Beer from Tequila Joe's hand, remember to think of the sequence in which you play cards to up your chances of getting one of the Beers at random. If you play a combination of BANG!, Duel, Indians!, Gatling/Howitzer, and offensive green cards, before playing the discard/steal cards, then you can significantly up your chances of drawing a Beer from his hand. Tequila Joe was likely to have at least 1 BANG! and a Missed! family card, and now that those are gone, you might get a Beer easier. The lower Tequila Joe's life points/card limit, the higher your chances will of grabbing his Beer. Lastly, Be careful when General Stores are played; if a Beer is flipped over, do your best to make sure Tequila Joe doesn't get it. This may reveal your role, and you will have to weigh the disadvantage from doing so, but it could also be quite worth it.

Return to the BANG! Character Guides Portal

Monday, February 28, 2011

Character Guide: Sid Ketchum

Sid Ketchum


Name: Sid Ketchum

Inspired by: Possibly Tom Ketchum, cowboy, cattle driver, train robber, and murderer hung in 1901 for attempting to rob a train. However, "Black Jack" was Tom Ketchum's nickname, and so seems to be Black Jack's nickname. It seems strange that Tom Ketchum inspired two characters. I am sure there were more Ketchums and Black Jacks that could have been the inspiration for these two.

Life Points: 4

Ability Type: Defensive

Ability: At any time, he may discard 2 cards from his hand to regain one life point. If he is willing and able, he can use this ability more than once at a time. The BANG! FAQ spells out that Sid Ketchum can use his ability out of turn: "Q26. Can Sid Ketchum use his ability even outside his turn, like a Beer card? A. Yes, he can."

Activation: Whenever Sid Ketchum has 2 cards in his hand and chooses to play them. These cards can be discarded even like a last second beer (See Emiliano Sciarra's discussion for this).

Cards enhanced by Sid Ketchum's ability: All cards except Beer, but especially Wells Fargo and Stagecoach

Card weakened by Sid Ketchum's ability: Beer (except in 2-player), Volcanic

Cards more effective when played against Sid Ketchum: Panic, Cat Balou (when targetting his hand), Jail

Cards less effective when played against Sid Ketchum: Duel, General Store

Characters who counter Sid Ketchum well: Jesse Jones

Ideal Roles for Sid Ketchum: Sheriff, Renegade

2-player Value: Okay. While it may seem very beneficial to still be able to gain life points when your opponent cannot from Beer cards, Sid Ketchum has to discard 2 cards to do so. Since Sid Ketchum will be the other player's only target, this may not be as useful as it seems. It can be good to get rid of cards in excess or cards that cannot otherwise be played (extra BANG! or Beer that can be played but has otherwise no effect), but it is far more limiting than before. It is only particularly useful if Sid Ketchum can create distance between himself and the other player. Sid Ketchum might try to use the cards as last second beers, and if he is not shot, use the ability when he gets more cards.

General Strategy as Sid Ketchum: As with many characters, the most important thing to do first as Sid Ketchum is to remember that he can use his ability whenever he has 2 cards in his hand. The ability to voluntarily discard cards is also very useful. Remember that each player can only have 1 card in play in front of him that has a given name. If he has another card with that name in his hand, then he cannot play it, so it is stuck in his hand unless he Cat Balous it from his own hand or he discards it when he is over his card limit. It is much better as Sid Ketchum to be able to discard this card to gain life points instead of just burning it. This is also true of Beer if Sid Ketchum survives until there is only 1 player left. Other players have to discard the card or use it with no effect, while Sid Ketchum can at least discard it to contribute to the cards needed to activate his ability. I enjoy having Sid Ketchum discard Saloon to gain health as well.

While Sid Ketchum has more "lasting power" due to his great defensive ability, I wouldn't draw too much attention to him. It is better to try to attack players who are in Sid Ketchum's range, but he is not in theirs. This way Sid Ketchum will only have to focus on using his ability when hit by "no-distance" cards such as Duel, Indians!, and Gatling. When it comes to Duel, it is often better for Sid Ketchum to just take the hit, unless he has a great chance of hitting the other opponent and he is not opening himself up for attacks from other players. Each BANG! card Sid Ketchum expends is essentially 1/2 a life point, and not having them in his hand for possible Indians! should really make him think twice before you play any of them. When a player next to Sid Ketchum attacks his, instead of responding back with aggresion if that player is in range, it can be a good idea to attack another player (which preferably cannot hit Sid Ketchum back). This will often surprise the initial player who attacked Sid Ketchum, and have make him wonder if he is on Sid Ketchum's team. I would only recommend doing this if there is another person that that player can target. Many times in BANG! we shoot at another player simply because we have excess BANG! cards and have only 1 player we can reach. Your confusion will probably not overcome this hurdle.

I wouldn't get too anxious to convert all of Sid Ketchum's cards to life points as soon as he can. Even cards that do not look (even are not) useful can be good to keep in Sid Ketchum's hand. Since other players do not know what those cards are, they create a sort of "imposing front" that may keep other characters from acting against Sid Ketchum. If Sid Ketchum removes all or most of the cards from his hand, then other players will have no problem attacking him. Keeping the cards in Sid Ketchum's hand is less problematic since he can play the cards at any time, even as less second beers. Of course, by keeping the cards in his hand Sid Ketchum is still taking a risk: perhaps a player will Cat Balou or Panic a card from his hand so that Sid Ketchum can no longer convert it. Such is BANG!

General Strategy against Sid Ketchum: When playing against Sid Ketchum, the main thing to do is to remember that his cards are his life points. Anything you can do to get him to expend his cards is in some sense taking away Sid Ketchum's life points. If he plays BANG! because of a Duel or an Indians! he has expended 1/2 a life point for each card. Thus, Cat Balous and Panics from his hand are very impactful, especially if the stolen card is an offensive card that you can use right back at him. Jails are very effective against Sid Ketchum as they keep him from replenishing cards during his drawing phase. Along these lines, you should be very careful when playing a General Store. If Sid Ketchum's health is low or you are trying to weaken him severely, you need to carefully weigh the pros and cons of giving Sid Ketchum another card. Oh, and as a good strategic rule (albeit not a kind one), I wouldn't remind Sid Ketchum when and how he can use his ability.

Besides this, Sid Ketchum is not the worst character to face one on one. The biggest difficulty is if you are stuck with Sid Ketchum and one of his team mates alone. Attacking Sid Ketchum is difficult because he can always burn the 2 cards he draws each turn to gain the life point you took away back, while his team mate shoots away at you. If you are stuck in this situation, for which I feel sorry for you, try to eliminate the more offensive character first and then try to deal with Sid Ketchum.

Return to the BANG! Character Guides Portal

Sunday, February 27, 2011

Character Guide: Bart Cassidy


Name: Bart Cassidy.

Inspired by: Butch Cassidy, infamous leader of the Wild Bunch Gang, train robber, bank robber, and partner of the Sundance Kid.

Life Points: 4.

Ability Type: Defensive.

Ability: Each time he loses a life point, he immediately draws a card from the deck.

Activation: When Bart Cassidy takes a hit.

Cards enhanced by Bart Cassidy's ability: Beer, Saloon, Missed!, Duel, Dynamite, Volcanic (somewhat).

Cards less effective when played against Bart Cassidy: Volcanic, all attack cards, Dynamite.

Characters who counter Bart Cassidy well: Jesse Jones.

Ideal Roles for Bart Cassidy: Sheriff, Renegade.

2-player Value: Not bad if you have some health by the time this occurs. Picking up some cards when you have to take hits at this point can be crucial in turning the tide on your opponent to win the game.

General Strategy as Bart Cassidy: The most basic thing to remember as Bart Cassidy is to remember his ability. When Bart Cassidy takes a hit, draw a card! You cannot expect the other players to tell you to do this. Besides Bart Cassidy's basic defensive benefit, you need to think of how to use it wisely. Bart Cassidy doesn't want to use it all of the time because having one less life point still means a greater constraint on his card limit. Thus, a great time for Bart Cassidy to take a hit is when he has a Beer card in his hand. He can immediately replenish the health lost and get an extra card--sweet! The drawn card can sometimes translate into a greater defensive (getting a Missed!, Beer, or Barrel card) or offensive position (it can be great to pick up a BANG! when Bart Cassidy has a Volcanic out after all). Even if Bart Cassidy doesn't have a Beer, there are also better times to take a hit rather than others. For instance, when another player plays a Duel against Bart Cassidy--he may not want to deplete tons of cards out of his hand just to not take a hit, when he will pick up a card from the hit anyway. Bart Cassidy's opponent may in addition have some Indians! stored up, and that can hurt if he depletes all of his BANG! I recommend trying to create distance from Bart Cassidy and other players, so that you only choose to take hits on "no distance" cards (Duels, Indians!, Gatling). On the flip side, certain cards like Duel and Dynamite are more advantageous for Bart Cassidy to play. Bart Cassidy may be able to afford the risk of dueling another player with 1 to no BANG! in his hand. Even if he loses the duel he initiates, he can still get a card draw. Oddly, maybe you could try to duel an opponent and lose it, just to try to pick up another BANG! to shoot at them with your Volcanic (they could have BANG! in their hand but no Missed! after all). If the Dynamite Bart Cassidy plays explodes on him, he still gets to draw 3 cards from the explosion (as long as Bart Cassidy has enough life points to survive the blast; he draws after losing the life points, not before).

General Strategy against Bart Cassidy: There are not many particularly specific strategies to effectively apply against Bart Cassidy. Since he is trying to store up Beer in his hand to have no eventual repercussions from taking hits, Cat Balouing, Panicking, or otherwise stealing/discard from his hand with a character ability (such as with Jesse Jones) can be a great idea. Also think of how to hurt his Beer acquisition. When a General Store is in play, it can be an especially good idea not to let Bart Cassidy pick it up if you can help it. Watch Bart Cassidy's life points closely: when Bart Cassidy's health is lower, Dynamite becomes safe to play because he will probably not survive the blast and so get no 3-card benefit from the lost life points. When you hit Bart Cassidy, you will need to try to hit him hard and not let him recover. Chances are that you will not be able to eliminate him too quickly in a round, as he has bound to pick up at least 1 Missed!, BANG!, or Beer, but team mates (if you have any) will need to try to focus fire on him to put him down.

Dodge City cards enhanced by Bart Cassidy's ability: Canteen, Whisky, Tequila.

Dodge City cards less effective when played against Bart Cassidy: All new attack cards (green and brown).

General Strategy Adjustments for Bart Cassidy: Bart Cassidy's strategy does not change too much with the addition of Dodge City. There are now some new brown and green cards to help him regain life points (Canteen, Whisky, Tequila), which can help him when he chooses to voluntarily take hits. The new green attack cards give him some time to prep for when his enemies have gained some fire power, which can also aid him in his decision making. Some of the new cards hit a player at any distance (Howitzer, Buffalo Rifle, Springfield), so Bart Cassidy (as before) has to be cautious with thinking that he can avoid hits solely through distance modifiers. Nonetheless, the new Hideout card could be handy to stack with a Mustang. Like usual, Bart Cassidy should try not to store up too many cards that regain life points in his hand as they can get easily discarded or stolen. The moment he loses a life point, he should try to regain it as quickly as possible to aid not only his card limit, but to keep that Beer (or similar card) from getting removed from him.

General Strategy Adjustments against Bart Cassidy: Your strategy against Bart Cassidy remains the same, you just have new cards to help you execute this strategy. Can Can, Conestoga, Brawl, and Rag Time can help you remove cards from Bart Cassidy's hand, and hopeful help you nab life point modifiers. You have many new attack cards under your belt to help you build offensive combos against Bart Cassidy, many of which are green cards. These cards have the unfortunate problem of warning Bart Cassidy a round in advance, so think about what you are communicating with those cards. If Bart Cassidy is out of range, you have a few new cards that hit players at any distance to help you. As with the original game, try to coordinate your attacks against Bart Cassidy with your team mates. Although he draws a card with each hit, there is a high chance that these cards are offensive, as they are the majority of the cards in the deck. This means that Bart Cassidy will have a lower card limit on his round, encouraging him to dump attack cards back at those who shot at him. So if you can knock him out before he gets to his turn, this is best.

Return to the BANG! Character Guides Portal

Saturday, February 5, 2011

Character Guide: El Gringo


Character Name: El Gringo

Inspired by: Ross Logan, the vengeful gringo in Requiem for a Gringo

Life Points: 3

Ability Type: Defensive

Ability: "Each time he loses a life point due to a card played by another player, he draws a random card from the hands of that player (one card for each life point). If that player has no more cards, too bad!, he does not draw. Note that Dynamite damages are not caused by any player."

Activation: When El Gringo is hit

Cards enhanced by El Gringo's ability: Missed!, Beer

Cards less effective when played against El Gringo: All attack cards, Volcanic

Cards more effective when played against El Gringo: Dynamite

Ideal Roles for El Gringo: Sheriff, Renegade

Characters El Gringo Counters Well: Willy the Kid

Characters that Counter El Gringo Well: Jesse Jones, Suzy Lafayette (potentially)

2-player value: Good, depending on the amount of health you have.

General Strategy: El Gringo is one of the best characters because of his defensive ability, especially when El Gringo is Sheriff. He must learn the best times to take hits, such as when El Grango can disrupt the strategy of his opponent. For the former, you can imagine an opponent playing an Indians! or Gatling before attacking El Gringo's ally with a BANG! El Gringo may then opt to take the hit to take a card out of his opponent's hand that may disrupt his attack. Similarly, El Gringo may consider taking hits from duels. The quality of cards El Gringo will pick up depends on the intelligence of his opponent, but El Gingo will often get Missed! since these are difficult cards to discard. Taking hits is a great idea when El Gringo has a Beer in hand, as he can steal a card and then he can get his health back.

El Gringo can help limit the amount of times when he can consider taking a hit by getting some helpful defensive cards in play such as Mustang and Barrel. The defensive sight modification will limit the amount of shots fired his way and the Barrel can be a nice buffer for some of the shots. If he wants to take a hit, he can not utilize the Barrel. Finally, I wouldn't play Dynamite as El Gringo, as he is the character most likely to suffer from it. El Gringo doesn't get any cards for being blown up by a Dynamite blast, and as a 3 life point character, the Dynamite will probably be fatal.

Playing against El Gringo: When El Gringo is in the game, be very careful of the order in which you play/use your cards. Whenever you play a card that can hurt El Gringo, you run the risk of losing cards from your hand. Thus, before you play any potentially damaging card for El Gringo, play other other cards first: blue cards, panic, cat balou, often Beer, Wells Fargo, Conestoga/Stagecoach, and often General Store. Once these are out of the way, you still need to consider the order in which you play these potentially damaging cards, as you do not want El Gringo to pick up certain cards over others. Thus, I suggest the following order for playing cards against El Gringo:

1. Gatling or Indians! (This is a toss up, so you may need to pay close attention to the cards that have been picked up and others' behavior; generally, Gatling can be more powerful as there are more BANG! than Missed!)

2. Gatling or Indians! (see above)

3. Duel

4. BANG!

Sometimes it is beneficial to deplete all of your cards down to 1, and then attack El Gringo. He doesn't get any cards when you do so, but then again, you also leave yourself wide open unless you have the right defensive setup. It is often valuable to Cat Balou from El Gringo's hand to knock out any Beer he may have stored up. Also, Cat Balou or Panic his Mustang so others can finish him off if you happen to weaken him. Dynamite is also a fantastic thing to throw out on El Gringo because (1) he is a 3 life point character and so the blasts are more devastating, and (2) he doesn't pick up any cards for losing life from Dynamite even if he happens to survive. Keep other general strategy items in mind, such as not playing Saloon (except in dire circumstances) when El Gringo is below full health.

Return to the BANG! Character Guides Portal

Character Guide: Paul Regret


Character Name: Paul Regret

Inspired by: Paul Regret, a gambler in the John Wayne film, The Comancheros

Life Points: 3

Ability Type: Defensive

Ability: "he is considered to have a Mustang in play at all times; all other players must add 1 to the distance to him. If he has another real Mustang in play, he can count both of them, increasing all distances to him by a total of 2."

Activation: Continuous, but surmountable

Cards enhanced by Paul Regret's ability: Mustang, blue cards

Cards less effective when played against Paul Regret: Panic, Volcanic

Cards more effective when played against Paul Regret: Duel, Indians!, Gatling

Ideal Roles for Paul Regret: Sheriff, Renegade

Characters who counter Paul Regret well: Rose Doolan, Willy the Kid

2-player value: Great if you can remove your opponent's gun.

General Strategy: Paul Regret's main benefit is his distance, and this can work especially well early game, even if Paul Regret's turn begins towards the end of the round, as few characters will be able to reach you. Paul Regret's distance ability makes most blue cards (obviously not Prison or Dynamite) more useful for him, as they are not likely to get stolen (there is only 1 scope, and what is the chance the persons right next to you will get it?). Paul Regret only has to worry about those 3 Cat Balous. Try to get a Mustang out to stack with Paul Regret's ability, and other defensive cards like Barrels are good ideas too. You may wish to get a gun to shoot over those who are right next to you, so as to not make enemies with your immediate neighbors who will be more able to attack you. In general, the whole purpose with Paul Regret is distance control: shoot at those who cannot shoot you, and make as many people unable to reach you as possible. Paul Regret's opponents will likely use a Duel to reach him, and in this case I often recommend taking the hit, since his card limit is lower, making Paul Regret have fewer BANG!, and thus more likely to get slammed by an Indians! before he gets to have another turn. But you can always gauge the cards in your opponents' hands and make the best judgment here.

Playing against Paul Regret: Since Paul Regret only has 3 life points, a lot of cards that hit all other players (Gatling, Indians!) are really effective against him, since Paul Regret's card limit is lower. Duels are also more effective against Paul Regret, as he is less likely to have a lot of BANG! cards. If you can do so, hitting Paul Regret with Duel-Indians!-Bang! (or similar) combos is the way to go. To help you reach Paul Regret, try to grab guns or a scope. Since panics won't be very effective against Paul Regret, use Cat Balous instead, especially if Paul Regret has a Mustang (making him terribly difficult to reach). If Paul Regret is your main target, consider even storing up a Cat Balou for when that Mustang will pop out. If you are having a really hard time getting Paul Regret, a Dynamite (which is always more fatal for 3 life point characters), can be a good idea to throw out.


Dodge City cards enhanced by Paul Regret's ability: Hideout, the extra Mustang.

Dodge City cards more effective when played against Paul Regret: Howitzer, Buffalo Rifle, Springfield.

Dodge City cards less effective when played against Paul Regret: Derringer, Punch, Knife

Dodge City Characters that Counter Paul Regret Well: Belle Star (Paul Regret cannot increase his distance further from her), Pat Brennan (he can immediately steal a gun, scope or binoculars to reach Paul Regret to shoot/steal from him, as well as remove Paul Regret's distance modifiers like Mustang and Hideout).

General Strategy Adjustments: Paul Regret does not scale well for Dodge City. Many players online have debated about increasing Paul Regret's life points up to 4 to compensate, but Emiliano Sciarra says that the adjustments only place him to about 3.5 life points. But since there is no half a life point, and the powers that be round down, he has stayed at 3 life points. It is often difficult to balance the 3 life point characters, because the main issue with raising them to 4 life points is how powerful they will be as a 5 life point Sheriff. Often, it is decided that they should remain a 3 life point character, but then they only tend to be decent as a Sheriff. I guess the hope is that in the other roles team mates will help them (sorry Renegades!).

Anyway, Paul Regret has trouble in Dodge City due to producing difficulties in managing distance between players. Dodge City adds a distance 3 Remington, a distance 4 Rev. Carabine, and a Binoculars (which stacks with a Scope) to the deck. Heavy to manage against a Scope and a Binoculars will be particularly difficult. There is, on the flip side, another Mustang and a Hideout (which stacks with a Mustang) to bring some distance away. But more Cat Balou, the Can Can, and Brawl have been added to the deck to remove players. The new Rag Time steals a card from any player at any distance, so Paul Regret is not as panic-immune as before. Unfortunately, there are also cards that attack at any range added to the deck, which are deadly for Paul Regret, namely Springfield, Buffalo Rifle, Howitzer, and of course more Indians! Since these cards are not BANG!, they can be combined with BANG! and others (Duel, Gatling) to hit Paul Regret several times in one turn. Finally, there is another frustrating Dynamite added to the deck.

Of course, things are not all bad for Paul Regret with Dodge City. Some new cards he is generally immune to, such as the Knife, Punch, and Derringer which all only reach at distance 1. Unfortunately, this just does not balance things out. Paul Regret should still try to follow the strategy generally outlined above, trying to steer himself as best as possible with these new cards. He now will definitely want to try to grab some defensive green cards to get in play in front of him before jumping to the offensive. And stacking his Mustang with a Hideout would be fantastic if it is possible.

General Strategy Against Adjustments: Dodge City turns things in your favor for eliminating Paul Regret. Supplied with more guns, a Binoculars, several cards that reach at any distance (Springfield, Buffalo Rifle, Howitzer, more Indians!), and another Dynamite, you have even more ammo than before to hit Paul Regret. Probably even more importantly, you can combine those cards to hit Paul Regret several times in a turn, and your team mates (if you have any) should have a greater ability to help you out. Use the new Rag Time, Can Can, and Brawl to remove cards from in play in front of Paul Regret, especially to remove his distance modifiers. If he has none of those, and no defensive green cards in play in front of him, use those cards and Cat Balou to remove cards from his hand before you and your allies attack him. A good combo or tag team could knock him out in 1-2 rounds. Of course, this is wishful thinking where the stars align for your good. Paul Regret is still a threat in Dodge City, it is just that if you pay close attention you should have greater opportunities to eliminate him than before.

Return to the BANG! Character Guides Portal

Wednesday, January 26, 2011

Character Guide: Lucky Duke


Character Name: Lucky Duke.

Inspired by: Lucky Luke, title character in a French comic series who reportedly could shoot faster than his shadow.

Life Points: 4.

Ability Type: Defensive.

Ability: Each time he is required to "draw!" he flips the top two cards from the deck, and chooses the result he prefers. Discard both cards afterwards.

Activation: Whenever Lucky Duke is required to "draw!" Namely when Lucky Duke has a Barrel in play and is attacked, or needs to "draw!" for Jail or Dynamite.

Cards enhanced by Lucky Duke's ability: Barrel, Dynamite.

Cards less powerful when played against Lucky Duke: Jail, Dynamite.

Ideal roles: Renegade, Sheriff (somewhat).

Characters who Lucky Duke can potentially counter well: Pedro Ramirez (has a better chance of avoiding the jail gauntlet), Slab the Killer (if Lucky Duke has a Barrel).

2-player value: It really depends if you can get a Barrel in front of you or get a Dynamite in play.

General Strategy as Lucky Duke: I will be honest--I hate Lucky Duke, at least in the original game (I think he is the worst character). Lucky Duke's ability is only useful on rare occasions, and will go turns without ever using it. There is also little you can do to control it, or make it more effective. Of course, don't forget to use Lucky Duke's ability when the time comes to "draw!" And we should appreciate that Lucky Duke's ability does make you virtually invulnerable to Dynamite and ups your chances to get out of Jail. Thus, it can be a good idea to play Dynamite if you don't think it is likely to blow up your team mate. It won't hurt you too bad. As a Sheriff, I recommend playing Dynamite nearly as often as you can. As Lucky Duke, it is almost imperative to get a Barrel. I recommend saving a Panic to yank one from an adjacent player if needs be, or even to have a back up. Being able to flip twice when shot is huge: just ask Jourdonnais when he has a Barrel. I even card count how many Cat Balous/Panics have been played before I lay my Barrel and consider how long it will likely stay in play. Since Lucky Duke's ability is very contingent on getting Barrels and Dynamites, I highly recommend playing it low before you get them. Vulture Sam is a similar character that does not want a target on his forehead at the beginning of the game. Don't draw attention to Lucky Duke, as you really need those cards to hold out and have some power.

Playing against Lucky Duke: The most important thing to deal with when Lucky Duke is in play is to control his use of the Barrel (Panic! or Cat Balou it as needs be) and to be aware of his virtual invulnerability to Dynamite. If Dynamite is in play, you may wish to Cat Balou it as well if you think there is only a good chance of it doing your team harm alone. If Lucky Duke is on a team and you don't particularly care which one is in Jail, don't play the Jail on Lucky Duke as he has a higher chance of getting out. Oh, and never remind Lucky Duke of his ability. It is to your advantage if he forgets.


Dodge City cards enhanced by Lucky Duke's ability: the extra Barrel, the extra Dynamite

Dodge City cards less powerful when played against Lucky Duke: the extra Jail, the extra Dynamite.

Dodge City Characters that Counter Lucky Duke Well: Belle Star (who makes Lucky Duke's Barrel useless when she attacks him), Pat Brennan (who can remove Lucky Duke's Barrel immediately when it comes into play).

General Strategy Adjustments: Unfortunately, Dodge City really doesn't make life any easier for Lucky Duke. Things generally stay the same for him, besides adding two characters--Belle Star and Pat Brennan--that can completely devastate him. Lucky Duke has another Barrel and Dynamite to tinker with, and he can try to augment his defense by getting some green defensive cards in play before going on the offensive.

General Strategy Against Adjustments: The strategy against Lucky Duke stays the same. There is another Dynamite in the mix, so watch out for that. You can use Rag Time, Can Can, Brawl, and the extra Cat Balou/Panic to steal or discard Barrels and Dynamite that Lucky Duke puts into play.

Return to the BANG! Character Guides Portal

Saturday, January 8, 2011

Character Guide: Jourdonnais

Jourdonnais BANG! Character


Name: Jourdonnais.

Inspired by: "French" Jourdonnais, The Riverboat Captain in The Big Sky.

Life Points: 4.

Ability Type: Defensive.

Ability: Whenever he is the target of a BANG!, he may "draw!": on a Heart, he is missed.

Activation: A BANG! is fired at Jourdonnais by another player [i.e., a player uses a BANG! card against him]

Cards Enhanced for Use: Missed!, Barrel.

Cards Less Powerful When Played against Jourdonnais: BANG!

Characters who Jourdonnais Counters Well: Slab the Killer [if Jourdonnais has a barrel, he can successfully draw from his ability and the Barrel to provide the two Missed! to cancel Slab's BANG!; see http://boardgamegeek.com/article/55513#55513 for Emiliano Sciarra's agreement on this], Willy the Kid. However, in some senses both Slab and Willy are decent counters to Jourdonnais because with Slab, even if he provides one Missed! with his ability, he still has to expend a card or take a hit, and Willy can often fire at Jourdonnais twice, giving him a dang good chance of hitting Jourdonnais at least once.

Characters that Counter Jourdonnais Well: Kit Carlson

Best role for Jourdonnais: Sheriff.

Good role for Jourdonnais: Renegade.

2-Player Value: Excellent. Since Beer no longer count, Jourdonnais' defense against BANG! is especially useful at this point.

General Strategy as Jourdonnais: Jourdonnais is a defensive character. If you are playing the BANG! variant where you can select 2 characters, I would recommend not picking Jourdonnais if you are an Outlaw or Deputy. Ideally for these roles you want offensive or neutral abilities (neutral meaning abilities that are interchangeable between offense and defense, such as Calamity Janet's ability), so that you can take down the Sheriff or the Outlaws. If you are dealt defensive characters, and you are an outlaw directly next to the Sheriff, Jourdonnais is not a bad choice as he will be able to soak up more BANG! than his comrades (and your other character likely). Jourdonnais might even Cat Balou/Panic guns from the Sheriff so that he has to focus his fire on him, and not on his teammates (given that Jourdonnais' health is not completely depleted). After all, the offensive characters are more likely to terminate the Sheriff. Jourdonnais would simply be the distraction.

Get a Barrel to "stack" Jourdonnais' ability against those BANG! cards, allowing him to "draw!" twice to avoid being shot. In fact, since Jourdonnais' ability is so enhanced by having a Barrel, I recommend saving a panic to steal someone else's Barrel for his use. Due to Jourdonnais' quasi built-in-barrel (his ability is NOT equivalent), he can be a little riskier with depleting cards (like BANG!) from his hand. This is especially true if Jourdonnais has a Barrel. Some card counting of Cat Balous and Panics is not a bad idea when it comes down to considering when the best time for Jourdonnais to lay down a Barrel is. Like all characters, card count the amount of Indians!/Duels that have been played so that Jourdonnais knows when to deplete his BANG! or not.

Playing Against Jourdonnais: When you play against Jourdonnais, it is important to remember that his ability is NOT equivalent to a Barrel. This means Jourdonnais' ability is not activated when Gatling is played (notice that the BANG! is capitalized unlike other cards where bang is in the lower case to differentiate between the card and the attack action). And since I have seen this question in boards, Jourdonnais' ability is NOT activated when BANG!s are discarded during duels (which should be obvious). Thus, use Duels, Indians, and Gatling to weaken Jourdonnais, and Cat Balou/Panic his Barrel as soon as possible. This is especially necessary if Jourdonnais is a Sheriff. Don't let Jourdonnais' ability intimidate you: you can hit him a lot more than you think.

NOTE: I think Jourdonnais is actually too weak a character once you add in Dodge City. There are too many cards that his ability does not account for (think of Punch, Howitzer, Buffalo Rifle, Springfield, Derringer, Knife, Pepperbox) that can be played simultaneously in 1 turn. I think his ability should be adjusted to deal with this: we could make a distinction between direct and indirect attacks. Whenever Jourdonnais is directly attacked (singled out for damage), he can use his ability (except for duels of course). Whenever the attack is global/universal (like from gatling, howitzer, and Indians) his ability does not activate. This keeps the original card game cards (with the addition of Howitzer) as being the same cards that can hurt Jourdonnais.

Return to the BANG! Character Guides Portal